10-minutes setup guide for building a NodeJS repo including Coveralls test stats. No need for Travis any more.
Table of Contents
Importance of CI for small NodeJS projects
CI/CD nowadays is an integral part of every medium to large-scaled software project to be successful. For small and very small projects, e.g. your private ones with you as the only developer, you may ask yourself if it does make sense to setup a CI process and bear all the efforts for that.
I was also wondering a long time about that question, but the clear answer to that is YES. Because:
Used Travis-CI for free so far? Use this guide to migrate.
Starting some time ago using CI for small NodeJS projects, Travis-CI was a perfect platform for doing that at no cost. Unfortunately, Travis-CI decided in late 2020 to change the product and pricing model… in a very bad way for a single non-commercial developer having only a couple of repositories.
So read on to get to know how to easily use GitHub actions instead… 😉
Setting up a minimal NodeJS CI workflow with GitHub actions and Coveralls
To use a GitHub action for building your repository at each push (on all branches), all you have to do is to place a YAML file under .github/workflows and commit it with your repo.
Update September 2022: GitHub bumped NodeJS from 12 to 16 for running actions. So make sure to use the appropriate versions v3 of the checkout and the setup-node action. Also you should use at least NodeJS 16 as basis for your own workflow.
# save as ./github/workflows/git-build.yml
# make sure that 'test-coverage' generates the coverage reports (lcov)

name: git-build

on:
  [push]

jobs:
  build:

    runs-on: ubuntu-latest

    steps:
    - uses: actions/checkout@v3
    - uses: actions/setup-node@v3
      with:
        node-version: '16.16.0'
    - run: npm ci
    - run: npm run test-coverage
    - name: Coveralls
      uses: coverallsapp/github-action@master
      with:
        github-token: ${{ secrets.GITHUB_TOKEN }}
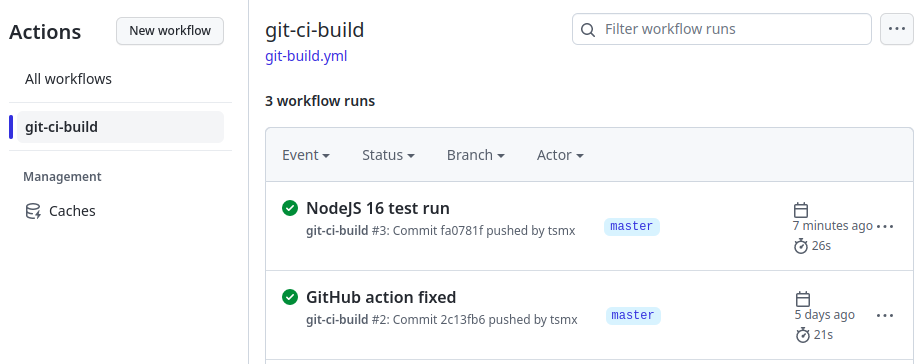
That’s it! Commit & push the workflow definition and head over to the Actions section of your repo where you can see all executed workflows…
…and detailed results for every step by clicking on the workflow…
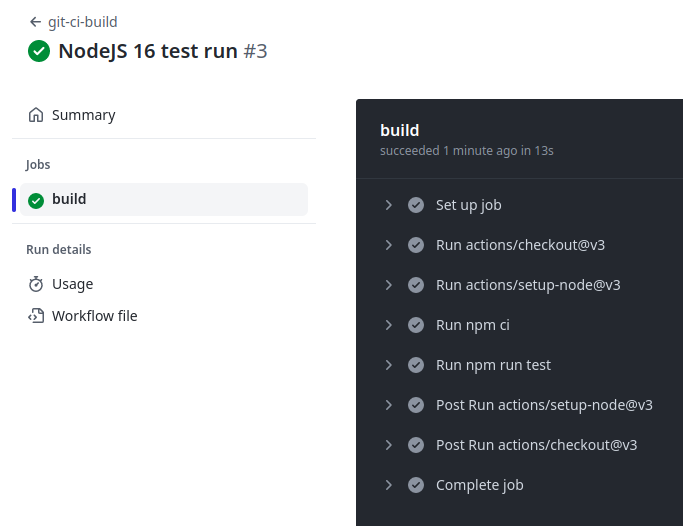
Easy, right? With the workflow definition above the following job will be executed on each push in every branch of the project:
For further information e.g. on how to build on multiple versions of NodeJS there`s a very detailed documentation on GitHub.
Some sidenotes about CI with GitHub actions:
Building and testing multiple NodeJS versions with one action
Sometimes it benefical to build and test your software with multiple versions of NodeJS, e.g. to cover backward compatibility or to test against all available LTS releases.
To achieve that, GitHub actions provides the feature to specify multiple NodeJS versions in one single action specification with the strategy and matrix elements.
# save as ./github/workflows/git-build.yml
# make sure that 'test-coverage' generates the coverage reports (lcov)

name: git-build

on:
  [push]

jobs:
  build:

    runs-on: ubuntu-latest

    strategy:
      matrix:
        node-version: [16.x, 18.x]

    steps:
    - uses: actions/checkout@v3
    - uses: actions/setup-node@v3
      with:
        node-version: ${{ matrix.node-version }}
    - run: npm ci
    - run: npm run test-coverage
    - name: Coveralls
      uses: coverallsapp/github-action@master
      with:
        github-token: ${{ secrets.GITHUB_TOKEN }}
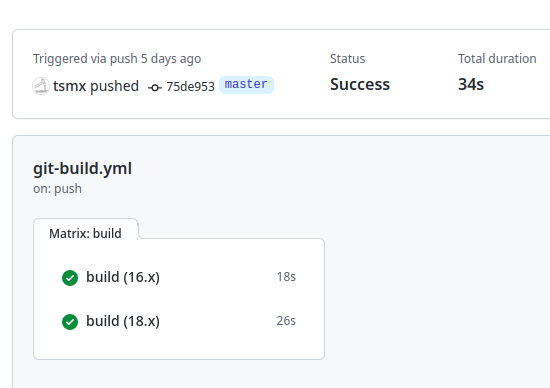
On pushing into the repo, GitHub actions will now execute 2 jobs for the specified NodeJS versions.
Commercial review of the solution
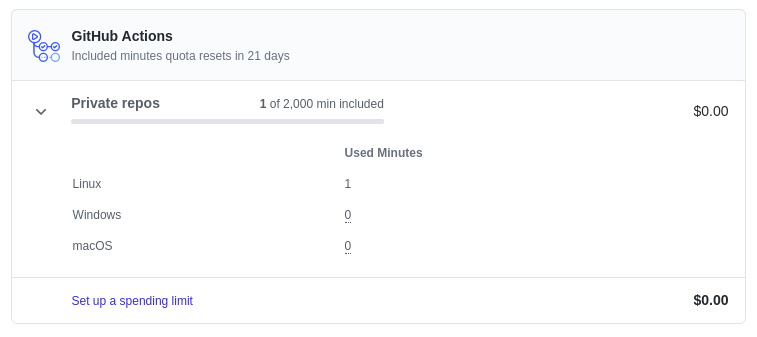
Setting up a CI build with GitHub actions is very easy – now what about the costs? Good news on that…
That’s fair. In comparison Travis CI was also free for public repos in the past but there wasn’t any free contingent for any private repo. Building even only one private repo you would have starting paying at Travis…
And even if the 2,000 minutes/month are not enough for you the GitHub plans seem very affordable compared to other CI service providers.
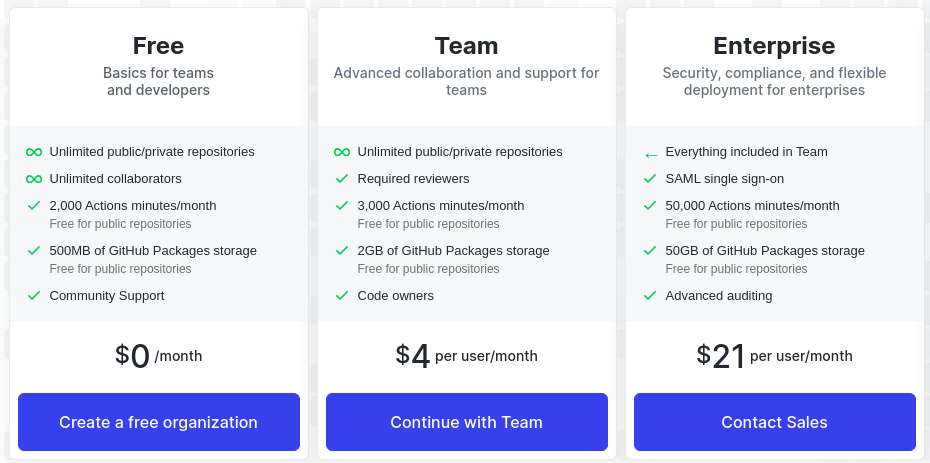
The next stage would cost you only 4$/month if you are a single developer. Pretty ok, right.
To easily keep track of your consumed actions minutes simply head to Billing&plans under your setting at GitHub. There you can also set up a spending limit if you’ve already provided a payment method.
