Tutorial on how to quickly set-up a React project with TypeScript and Bootstrap using Vite as build tool. We’ll use a simple demo app showing basic concepts of React like component destructuring and leveraging TypeScript benefits. Bonus: Deployment on AWS S3.
Table of Contents
The demo app
In this tutorial we’ll create a very small sample app called the “Horsepower Selector”. This app is showing a static list of car models on the left side and let’s you select one to show the horsepower detail on the right side – like so:
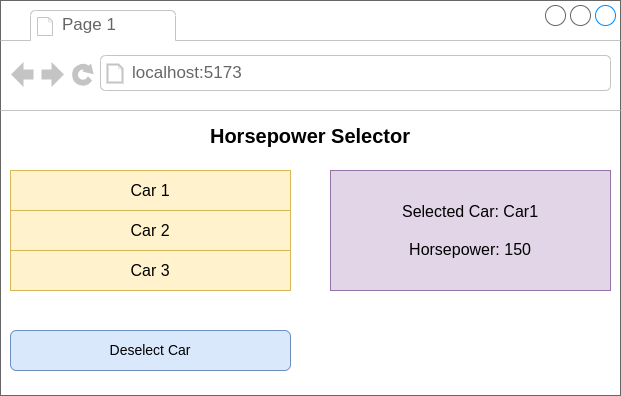
Although this app is quite senseless 😉 it’s very well suited to demonstrate basic concepts:
To follow along, you can find the Horsepower Selector app on GitHub.
So let’s get started…
Scaffolding the app with Vite
To scaffold, develop and – later on – deploy a modern React TypeScript app, the build tool Vite is a very good choice. To create the skeleton run the following commands:
$ npm create vite demo-app -- --template react-ts
$ cd demo-app
$ npm install
This creates the app skeleton in the demo-app directory and installs all needed dependencies. If you are running Vite for the very first time, you may be asked if it should be installed – simply confirm that.
As Vite is creating quite a lot of example code, let’s do a bit of cleanup for a fresh start:
After that, rewrite App.tsx in the main folder to the following (delete everything else).
function App() {
  return (
    <div>Horsepower Selector</div>
  );
}

export default App;
Now run the following command and navigate to localhost:5173 in your browser.
$ npm run devYou should now see the very first draft of our demo app.

That’s all it takes to create a React TypeScript app with Vite and get it up&running in development mode. Now let’s move on to integrate Bootstrap…
Integrating React Bootstrap
To make the most efficient use of Bootstrap in React, we’ll use React Bootstrap. This allows us to leverage the power of the Bootstrap framework with normal React components instead of plain CSS. Anyways, the direct use of Bootstrap CSS is still possible for fine-tuning.
To integrate React Bootstrap, install the following packages in the project.
$ npm install react-bootstrap bootstrapAfter that is done, add the following import line in main.tsx.
import 'bootstrap/dist/css/bootstrap.min.css';Reviewing the app in the browser you sould see the font changed to the Bootstrap default.

Now that Bootstrap is integrated in our app, let’s move on to the app architecture by specifying React components and identifying what TypeScript types would be needed for proper handling of state and component props.
App architecture: components and types
The decomposition of our demo app into React components and a type for state and props would resolve into two components CarList and CarDetail and one Car type like that:
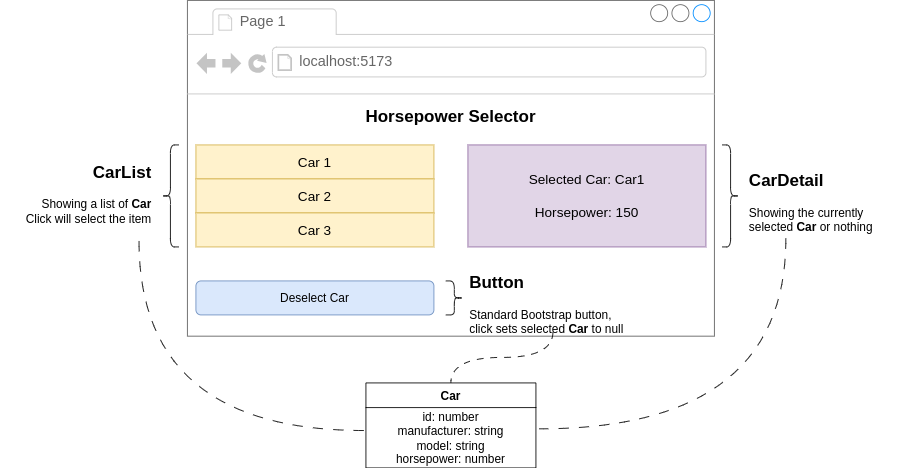
For the button to de-select a car we would not create a component and instead use a standard Bootstrap button.
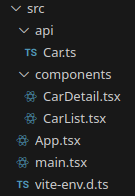
As a best practice, we will place all components as *.tsx files in a components subfolder of src and all types as *.ts files in another api subfolder. Our resulting project structure in the src folder then looks like that.
The Car type
To implement the Car type, we’ll create a file src/api/Car.ts with the following content.
export interface Car {
  id: string;
  manufacturer: string;
  model: string;
  horsepower: number;
}
This type will be used by the CarList and CarDetail components and ensures one central defintion of a ‘Car’ throughout the app.
The CarList component
For showing the CarList on the left side of the app, we will create a standard list view component that maps over an array of type Car recieved as a prop. For clicking on a list item, a callback handler that selects the clicked Car will be also put in as a prop. This handler should later on set the clicked car in a piece of state and return nothing (void in TypeScript).
As usual when using React with TypeScript, we will define in interface for the compoents props based on the defined Car type. To style the CarList, we use React Bootstraps ListGroup. The resulting CarList component in src/components/CarList.tsx then is:
import ListGroup from 'react-bootstrap/ListGroup';
import ListGroupItem from 'react-bootstrap/ListGroupItem';

import type { Car } from '../api/Car';

interface CarListProps {
  cars: Car[],
  onCarClick: (car: Car) => void
}

export default function CarList({ cars, onCarClick }: CarListProps) {
  return (
    <div>
      <ListGroup>
        {
          cars.map(car => {
            return (
              <ListGroupItem key={car.id} action onClick={() => onCarClick(car)}>
                {`${car.manufacturer} ${car.model}`}
              </ListGroupItem>
            );
          })
        }
      </ListGroup>
    </div>
  );
}
Next let’s move on to the design of the CarDetail component that shows the details for an item clicked in the list.
The CarDetail component
The component for showing the details of the selected Car will receive this car as a prop or null if nothing is selected. This is expressed by Car | null as type for the corresponding property. The rest of this component is quite straight forward. For a nice styling we use React Bootstraps Card and Placeholders for the details if nothing is selected yet. The component file src/components/CarDetail.tsx then results to:
import Card from 'react-bootstrap/Card';
import Placeholder from 'react-bootstrap/Placeholder';

import type { Car } from '../api/Car';

interface CarDetailProps {
  car: Car | null;
}

export default function CarDetail({ car }: CarDetailProps) {
  return (
    <Card>
      <Card.Body>
        <Card.Title>
          {car ? `${car.manufacturer} ${car.model}` : 'Please select a car on the left'}
        </Card.Title>
        {
          car ?
            (
              <Card.Text>{`Horsepower: ${car.horsepower}`}</Card.Text>
            ) :
            (
              <Placeholder as={Card.Text} animation="glow">
                <Placeholder xs={2} /> {' '}
                <Placeholder xs={1} />
              </Placeholder>
            )
        }
      </Card.Body>
    </Card>
  );
}
Next let’s move on to the main App component and wire it all up.
Putting it all together in the App component
In the App component, we import the Car type as well as the CarList and CarDetail components. For the sake of simplicity in this demo app, we’ll define a static array carArray that serves as the list of available cars and is used for initializing the cars piece of state. Normally, this array would come from some API or DB query and could also be empty – but for demo reasons let’s keep it simple. The second state variable is called selectedCar and will start with a vlaue of null which means “nothing selected”.
To style the main app, we use Bootstraps grid system elements like Container and its siblings. Note I also used some Bootstrap CSS classes directly for some fine-tuning.
import { useState } from 'react';

import Container from 'react-bootstrap/Container';
import Row from 'react-bootstrap/Row';
import Col from 'react-bootstrap/Col';
import Button from 'react-bootstrap/Button';

import type { Car } from './api/Car';

import CarList from './components/CarList';
import CarDetail from './components/CarDetail';

const carArray: Car[] = [
  {
    id: 'f150',
    manufacturer: 'Ford',
    model: 'F-150',
    horsepower: 465
  },
  {
    id: 'm5',
    manufacturer: 'BMW',
    model: 'M5 Touring',
    horsepower: 520
  },
  {
    id: 'golf',
    manufacturer: 'VW',
    model: 'Golf VII',
    horsepower: 150
  }
];

function App() {

  const [cars] = useState<Car[]>(carArray);
  const [selectedCar, setSelecetedCar] = useState<Car | null>(null);

  return (
    <div>
      <h1 className='text-center mt-4'>Horsepower Selector</h1>
      <Container className='mt-4'>
        <Row>
          <Col>
            <CarList cars={cars} onCarClick={(c) => setSelecetedCar(c)} />
            <Button
              variant="primary"
              className='mt-4'
              onClick={() => { setSelecetedCar(null) }} >
              Deselect car
            </Button>
          </Col>
          <Col>
            <CarDetail car={selectedCar} />
          </Col>
        </Row>
      </Container>
    </div>
  );
}

export default App
Now start the app with npm run dev and head over to localhost:5173 in your browser to see it in action.
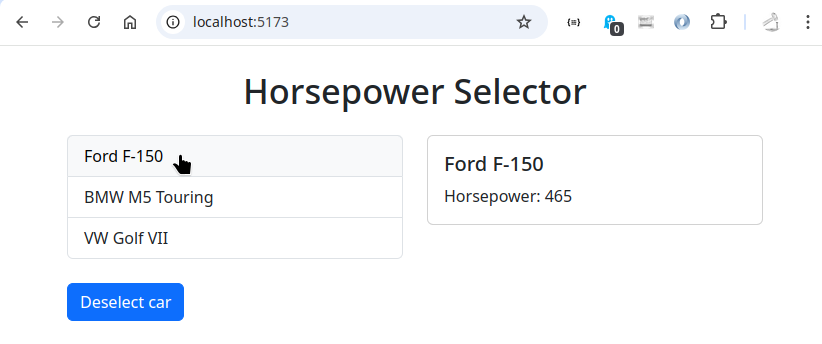
Awesome! Our demo app is working and looking quite good 🙂
If you are interested in applying a custom style beyond the standard Bootstrap theme, also checkout the customization guide.
Next let’s have a look at how we can use Vite to support our development and build process.
Developing and building with Vite
Running the app in development mode
To run your React app in development mode simply type npm run dev. Vite will then start the local development server running on port 5173 by default.
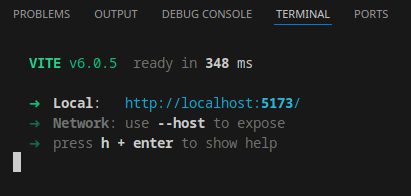
This let’s you access your app on localhost:5173 in your browser. You can let this Vite development server run in a terminal while writing code.
Whenever you make changes to your source files and save them, Vite will recognize this and automatically reload your app so that you can re-visit the changes in your browser immediately.

Rarely there are some changes which may not be reflected correctly after a reload. If so, press CTRL-C to stop the development server and start it up again.
Build for production and test locally
To create a production-ready build of your application, use npm run build.
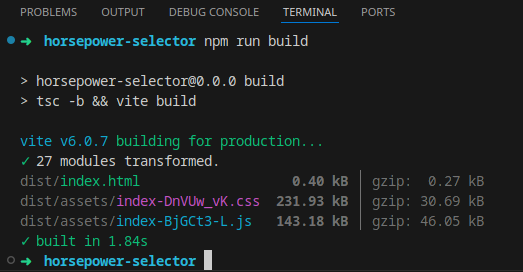
This creates all files needed for a production deployment in the dist/ folder. Before you deploy them, you can test exactly this files by running npm run preview.
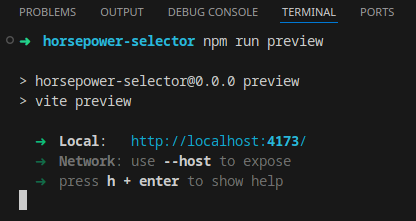
This command is somewhat identical to npm run dev but it uses the build files and starts a server on port 4173 by default.
If everything is ok with your preview, you’re ready to deploy the contents of dist/.
Changing default ports
As stated above, the two commands dev and build will start servers on ports 5173 and 4173 by default. If you want or need to change those ports, you can do this by adding respective options in the vite.config.ts file in the root directory of your app.
In the default export of this file, the options you need to set are server.port and preview.port, like so:
import { defineConfig } from 'vite'
import react from '@vitejs/plugin-react'

// https://vite.dev/config/
export default defineConfig({
  plugins: [react()],
  server: {
    port: 3000
  },
  preview: {
    port: 3030
  }
})
In this example the development server will listen on localhost:3000 and the preview will be available under localhost:3030.
Bonus: Deploying on AWS S3
In this bonus chapter we will deploy the React TypeScript demo app to an AWS S3 bucket configured to serve static web content. To follow along, you need an AWS account and the AWS CLI installed and configured.
As you might know, to host a React app, any static web content provider is sufficient. AWS provides an easy and very inexpensive way to host static web content in their S3 buckets.
To get started, create a new bucket and edit the website hosting properties:
Note: It is strongly recommended to use a new and separate bucket for the website hosting. As it would be necessary to open it for public access, you should not use this bucket for anything else!
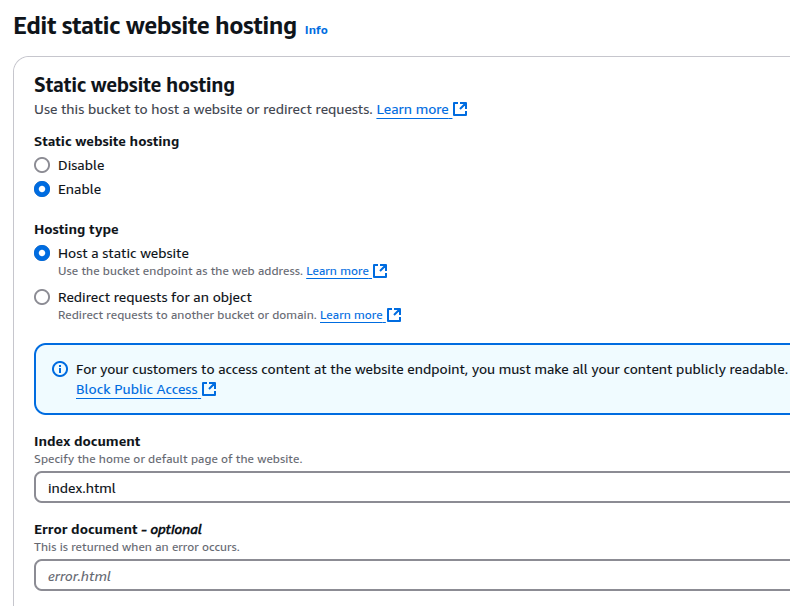
Next as mentioned, the bucket needs to be opened for public access. To do so, edit the “Block public access” settings and remove all checkmarks.
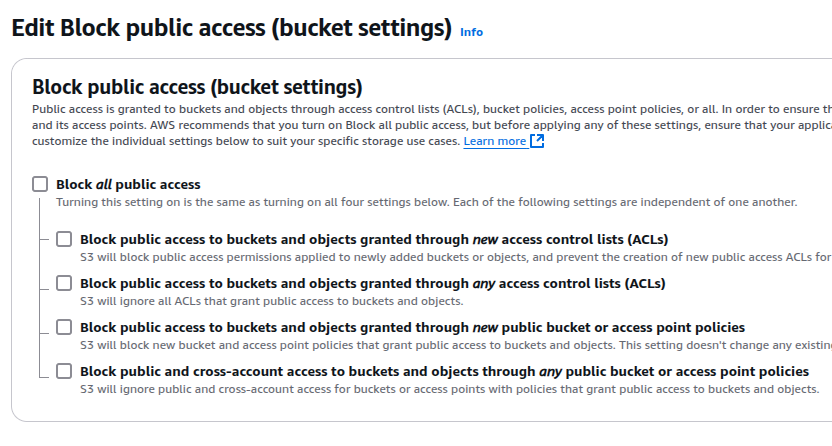
After that is done, edit the bucket policy and enter the following JSON policy document – replace BUCKET_ARN with your buckets ARN that can be copied from above the policy editor field (note the trailing “/*” that must be present!).
{
	"Version": "2012-10-17",
	"Statement": [
		{
			"Sid": "PublicReadGetObject",
			"Effect": "Allow",
			"Principal": "*",
			"Action": "s3:GetObject",
			"Resource": "BUCKET_ARN/*"
		}
	]
}
Last thing you have to do is to deploy your app by copying the dist files to the bucket using the aws s3 cp command. For streamlining the copy process, we add an entry named deploy-s3 to the scripts section of our package.json – replace BUCKET_NAME with your bucket name:
"deploy-s3": "cd dist/ && aws s3 cp . s3://BUCKET_NAME --recursive"Having that, you can call npm run deploy-s3 and all files of the dist/ folder should be copied to your bucket. After that, head over to the AWS console and check your bucket properties down at the bottom to find the URL for public access.

Visiting the mentioned URL in your browser you should see the demo app.
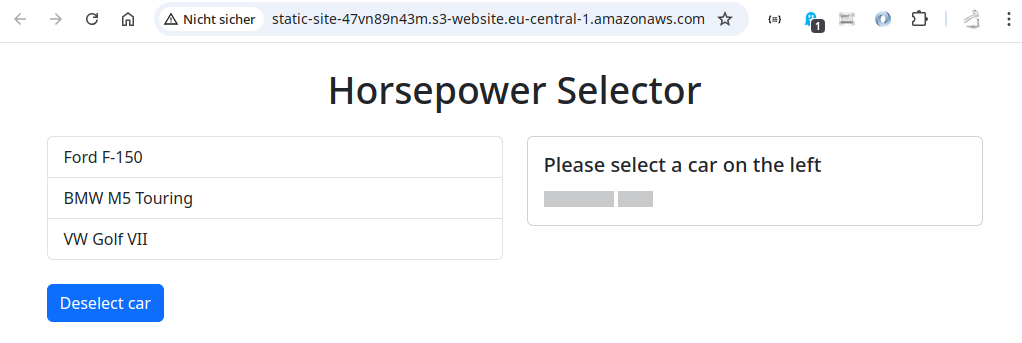
Congratulations, you’ve successfully deployed your React app to a production environment.
Happy coding 🙂
Useful links
Credits: This article is inspired by the superb React online courses and trainings of Stephen Grider.
