Creating a convenient and production-grade configuration management for a GCP cloud function in Node.js using Secret Manager and the secure-config package. Includes a complete example project on GitHub.
Table of Contents
Goals and general setup of the cloud function configuration
Like in a traditional app, it’s very common that you’ll need sensitive configuration data in a GCP cloud function, e.g. a DB username and password. This article shows a proper way of achieving this by leveraging managed cloud services and an additional Node.js package. The goals of this setup are…
To achieve this, we’ll be using two components for the cloud functions configuration setup:
- The secure-config package to securely store the complete configuration as an encrypted JSON file. Uses strong AES encryption and standard JSON, works with nearly any runtime environment.
- GCP Secret Manager for secure storage and passing of the secure-config master key to the cloud function by using an environment variable.
If you wonder that using Secret Manager itself without any addiational package may be sufficient, take a look on the further thoughts.
Steps to implement the configuration management in your cloud function
Install secure-config and create the config files
Install the secure-config packge by running:
npm install @tsmx/secure-config --saveHaving this, create a conf subfolder in your project with the configuration files. In the tutorial we’ll create two files, one for local testing purposes without any encrpytion and a production version which will be used in GCP with an encrypted secret.
The unencrypted config file will be conf/config.json with the following simple content:
{
  "secret": "secret-config-value"
}
To create the encrypted production version I recommend to use the secure-config-tool. If you don’t want to install this tool, refer to the secure-config documentation on how to generate encrypted entries without it.
For simplicity I assume you have secure-config-tool installed an we will use 00000000000000000000000000000000 (32x 0) as the encryption key. Having this, create the encrypted configuration for production of the cloud function as following…
cd conf/
export CONFIG_ENCRYPTION_KEY=00000000000000000000000000000000
secure-config-tool create -nh -p "secret" ./config.json > ./config-production.json
This will create config-production.json in the conf directory with an encrypted secret, like so:
{
  "secret": "ENCRYPTED|a2890c023f1eb8c3d66ee816304e4c30|bd8051d2def1721588f469c348ab052269bd1f332809d6e6401abc3c5636299d
}
Note: By default, GCP will set NODE_ENV=production when you run a cloud function. That’s why the secure-config package will look for conf/config-production.json if you don’t specify something else. For all available options of the secure-config package, refer to the documentation.
To prevent unwanted exposure of sensitive data, use a .gcloudignore file in the root folder of your project to only upload the encrypted production configuration to GCP when deploying. The following lines will tell gcloud to ignore all files in the conf/ folder but the config-production.json.
# don't upload non-production configurations
conf/*
!conf/config-production.json
Make sure to also check uploads to any public code repo in the same way using .gitignore or something similar.
Use the configuration in your code
Use the configuration values in your cloud function code. Here as an ES module in the main function ./index.js:
import secureConfig from '@tsmx/secure-config';
const config = secureConfig();

export const helloGCP = (req, res) => {
 res.json({
    info: 'Hello from GCP cloud functions!',
    secret: config.secret
  });
}
Of course this also works with CommonJS using require. From a code perspective that’s all, next step is to set-up GCP for passing the configurations key to the function.
Store the configuration key in Secret Manager
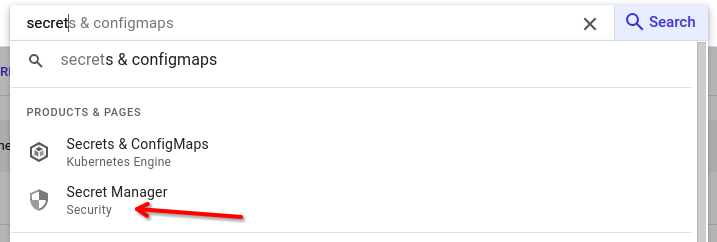
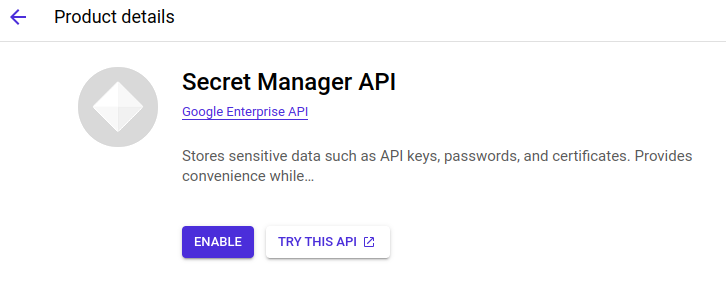
In your GCP console search for “secret manager” and enable the API if not already done
After secret manager is enabled, click on “CREATE SECRET” on the top and create a new secret with name CONFIG_KEY and a secret value of 00000000000000000000000000000000. After creating the secret you can see it in the list and click on it to view the details.
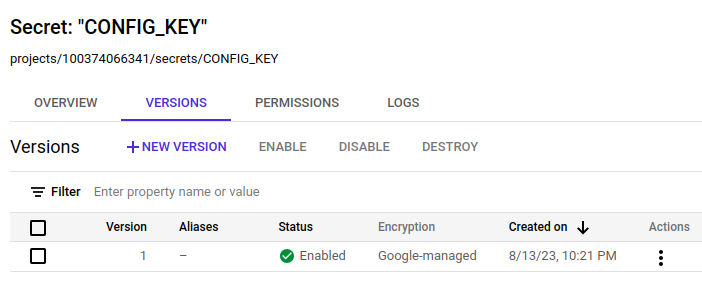
Directly below the friendly name you can find the secret’s reference which in this case is projects/100374066341/secrets/CONFIG_KEY. This reference will be used later to securely pass the secret as an environment variable to the cloud function.
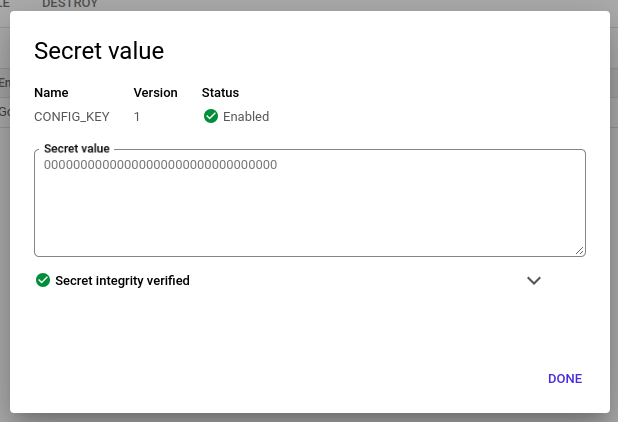
To verify the value of a secret, click on the three dots behind a version and go to “View secret value”:
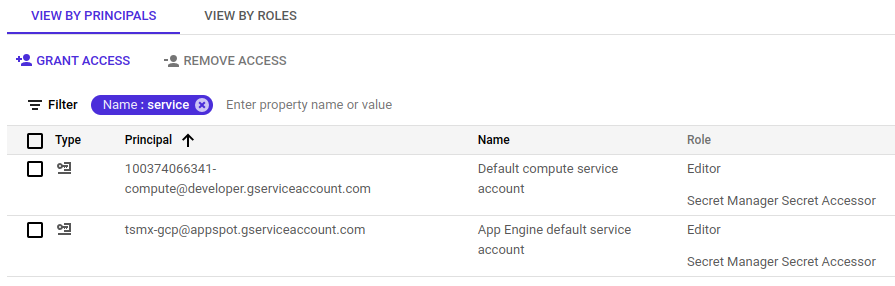
Last step is to grant the service account used for function execution the Secret Manager Secret Accessor role so that the secret can be accessed. By default, GCP uses the following accounts to execute cloud functions depending on the generation:
- Gen 1:
PROJECT_ID@appspot.gserviceaccount.com - Gen 2:
PROJECT_NUMBER-compute@developer.gserviceaccount.com
For more details on the used IAM account refer to the function identity documentation. Depending on the generation you’ll deploy the function, select the appropriate account under IAM in the console and make sure it has the Secret Manager Secret Accessor role. Add it if necessary by clicking “Edit principal” and then “Add another role”.
That’s it for the secret manager part. The master key needed for decryption of the configuration is now securely stored and ready to use.
Deploy and run the cloud function
The cloud function is now ready to deploy. To do so, we use gcloud functions deploy.
gcloud functions deploy secure-config-function \
--gen2 \
--runtime=nodejs18 \
--region=europe-west3 \
--source=. \
--entry-point=helloGCP \
--set-secrets=CONFIG_ENCRYPTION_KEY=projects/100374066341/secrets/CONFIG_KEY:latest \
--trigger-http \
--allow-unauthenticated
The option --set-secrets=CONFIG_ENCRYPTION_KEY=projects/100374066341/secrets/CONFIG_KEY:latest tells GCP to supply the cloud function with an env var named CONFIG_ENCRYPTION_KEY expected by secure-config with a value of the latest version of the secret projects/100374066341/secrets/CONFIG_KEY. Make sure to replace the secret’s reference with your specific value.
For a complete description of the options refer to the documentation of gcloud functions deploy.
On completion, gcloud will tell you the URL of the successfully deployed function.
...
updateTime: '2023-09-01T20:44:08.493437974Z'
url: https://europe-west3-tsmx-gcp.cloudfunctions.net/secure-config-function
Call this URL to verify the function is working.
curl https://europe-west3-tsmx-gcp.cloudfunctions.net/secure-config-function
{"info":"Hello from GCP cloud functions!","secret":"secure-config-value"}
You should also see the function with a green check mark in your GCP console.

Perfect! The cloud function is deployed and works using a secure configuration management.
Example project at GitHub
A complete example project is available on GitHub.
git clone https://github.com/tsmx/secure-config-cloud-function.gitFor easy deployment of the function, a deploy script is provided in package.json. Simply invoke this with npm run. Make sure gcloud is configured properly and you are in the right project.
npm run deployFurther thoughts
If – and only if – your function is using very few simple configuration values, nesting, structuring, using arrays and managing multiple environments in the configuration are not of interest, I would suggest to stick with Secret Manager only and leave out the usage of the secure-config package.
Normally, at least some of that options are of interest in your project and the use of the package absolutely makes sense. For a full view of the features you’ll get out of that package refer to the documentation.
Happy coding 🙂